Ender 3 V3 KE Filament Sensor Relocation DEFINITIVE EDITION
- 13 views
This model is hosted on Creality Cloud. Files, images and license details belong to the original creator.
View on Creality Cloud ↗Description
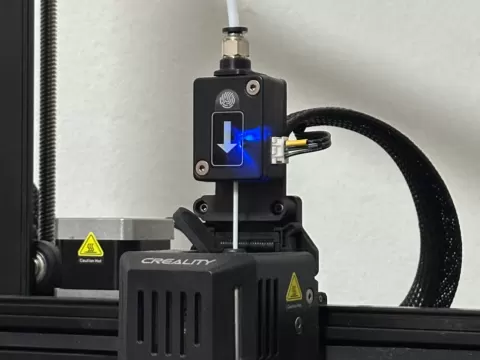
For this version, you need to remove the two Allen screws from the sensor; this releases a metal part and makes the sensor much lighter. Additionally, this new design keeps the sensor perfectly centered, preventing unnecessary friction.Once the metal part is removed, simply screw the sensor onto the printed part using the two original Allen screws, then mount the assembly in place of the original small cable guide (again, using the original screws).The model does not have built-in threads; the screws should be slightly larger than the holes so that, when driven in with a bit of force, they cut their own threads. Depending on your printer, the holes may end up being too large or too small, so you might want to print a test piece first.If the hole is too small, screwing them in will be difficult; if it is too large, you may not be able to tighten them enough, and the sensor could end up loose.You will notice two holes at the top of the model; these are for attaching a small adapter that allows you to screw in a PC4 connector to create a reverse Bowden system.You can find the adapter by visiting my profile.
About this model
Ender 3 V3 KE Filament Sensor Relocation DEFINITIVE EDITION is a free 3D model in the Animals & Creatures category, shared by the Creality Cloud community. You can download it for 3D printing and reuse it in your own projects under the terms of its original license.
File formats
- STL — The most common mesh format for 3D printing — ready to slice and print on almost any printer.
The files for this model are hosted on Creality Cloud. Use the button above to open the original page and download it.