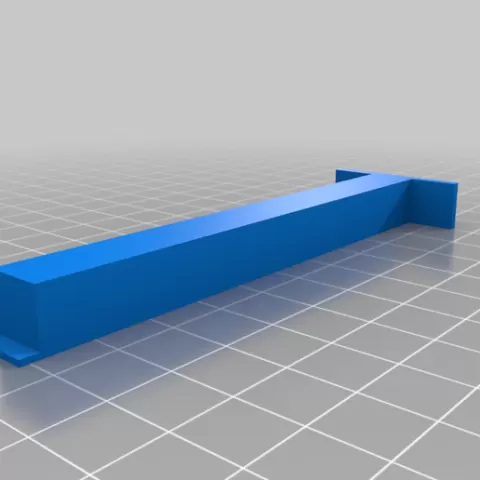
Creality Ender 3 S1 Pro - Tramming Tool
- 7 views
This model is hosted on Cults3D. Files, images and license details belong to the original creator.
View on Cults3D ↗Description
Print two of these and call me in the morning :) Power off your printer and loosen the grub screws on your z axis belt up top so that both sides independently move on their lead screws. Place the tramming tools against the two Z axes extrusions and lower the X gantry down on to them. Turn each stepper until they are both equally snug / compressed between the X axis extrusion and the top of the S1 Pro base plate. Tighten down your grub screws and make sure they are sandwiched properly against their pulleys. Also ensure the tramming tools remain snugly sandwiched between the X axis extrusion and the top of the S1 Pro base plate. Power on your printer, Raise Z 10 mm, remove the tramming tools, and you're done. --- UPDATE --- A second tram tool has been added that allows you to tram to the TOP of the machine. The procedure is much the same, but you square to the top rather than the bottom. Enjoy!
About this model
Creality Ender 3 S1 Pro - Tramming Tool is a free 3D model in the Tools category, shared by the Cults3D community. You can download it for 3D printing and reuse it in your own projects under the terms of its original license.
File formats
- STL — The most common mesh format for 3D printing — ready to slice and print on almost any printer.
The files for this model are hosted on Cults3D. Use the button above to open the original page and download it.
Similar models
 Free
Free
Customizable Text Stamp: Clay, Soap, Leather, Ink
 Free
Free
Build Tray — Modular Organizer for Assembly, Disassembly and Maintenance
 Free
Free
Window Stop • Eccentric Clamping • Parametric
 Free
Free
Buildplate Cleaner
 Free
Free
Build Tray - More Modules
 Free
Free
Bambu scraper handle V2
 Free
Free
192 Piece Gridfinity Bin Set|42mm Base|49mm Height
 Free
Free